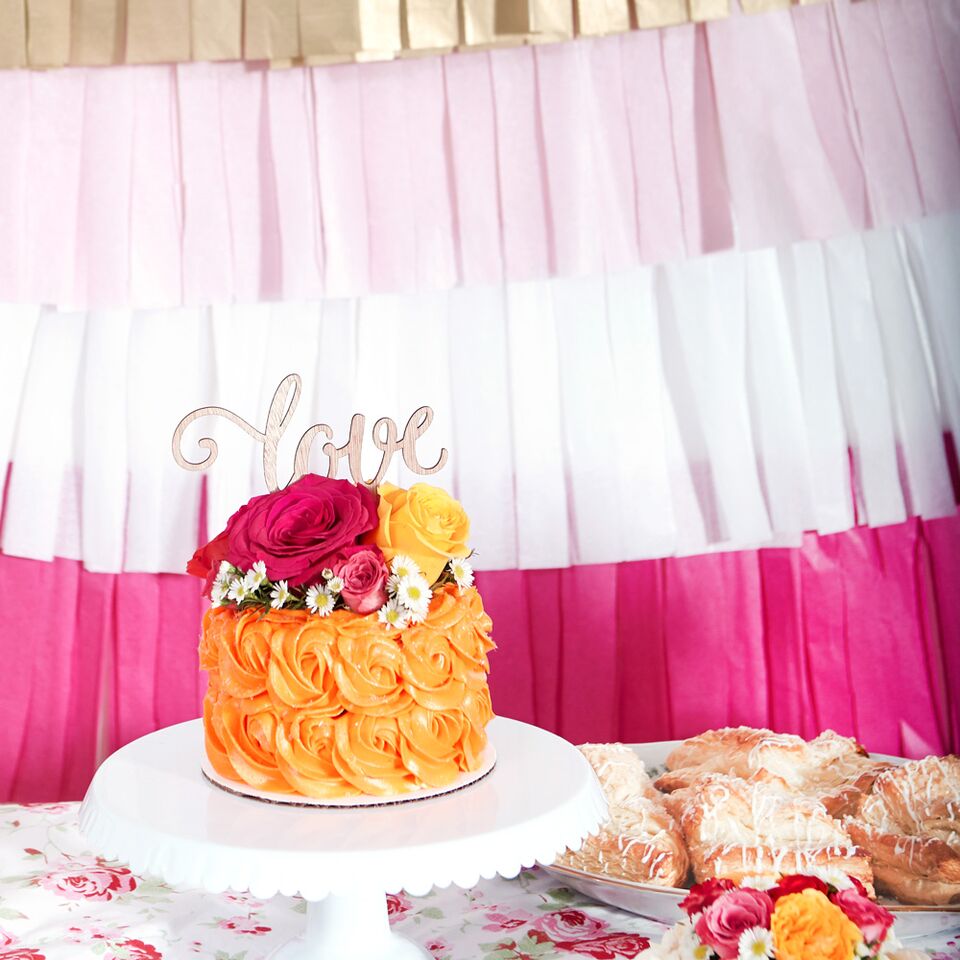
Are you hosting a party soon, and looking for something new and different to add to your party décor? For your next party, create a custom DIY fringe backdrop. With as little as some tissue paper in your choice of colors, twine or string, and scissors, you will be well on your way to having a gorgeous, original fringe backdrop! Perfect for a DIY photo booth or simply a gorgeous feature behind the dessert table, your custom designed DIY fringe backdrop will create an eye-catching addition to your party décor.

Fringe Backdrop DIY
Note: Your fringe décor can be affixed directly to a wall with push pins or adhesive hooks, or you can attach it onto something more portable, like foam board or poster board. Of course, push pins will work much better on a wall than on foam board, so if you opt for a portable fringe backdrop, pick up some clear packing tape, too.
What You Need
Tissue paper
Twine/String
Scissors
Push pins, adhesive hooks or tape
Optional: poster/foam board
What You Do
-
Separate and unfold your sheets of tissue paper completely, then fold in half lengthwise.
-
Cut your fringe (toward the fold) stopping about 2 inches from the fold (tip, double the tissue for a fuller look!)
-
Prep your twine by cutting lengths that will fit one or two sheets of tissue paper lengthwise, depending on the size of the area you're wanting to decorate. Be sure to allow for slack and an extra 8” or so to allow for tying the twine.
-
Working bottom to top to allow for layering, attach just one piece of the twine to the wall with the push pins or adhesives.
-
Hang your fringed tissue paper on the twine, with the fold aligning with the twine. Your bottom layer is complete!
-
Repeat steps 4 and 5 in the color pattern you want until you reach the top of your space. Be sure to attach each additional layer close enough to the one beneath it so that the tissue tassels overlap.
-
If you are using foam board or poster board, do the same, simply taping the twine on the back side of the board.
Voilá! Your fringe backdrop DIY is done and totally fab! Add some designer balloons, and you’re all set to party!